Purchase entry
What is a Purchase?
When a purchase transaction takes place, a document, detailing the transaction (item name, tax, etc) has to be saved for maintaining the stock, Vendor transaction, tax details. This document is called "Purchase Invoice" or "Purchase Bill". The practice of Maintaining an Invoice is available in InventoryPlus.
Home of InventoryPlus > Purchase from tool bar menu the Purchase Invoice screen. The Purchase Invoice mode is default. Purchase return can be entered by clicking on Purchase Return button from purchase screen from left side control.
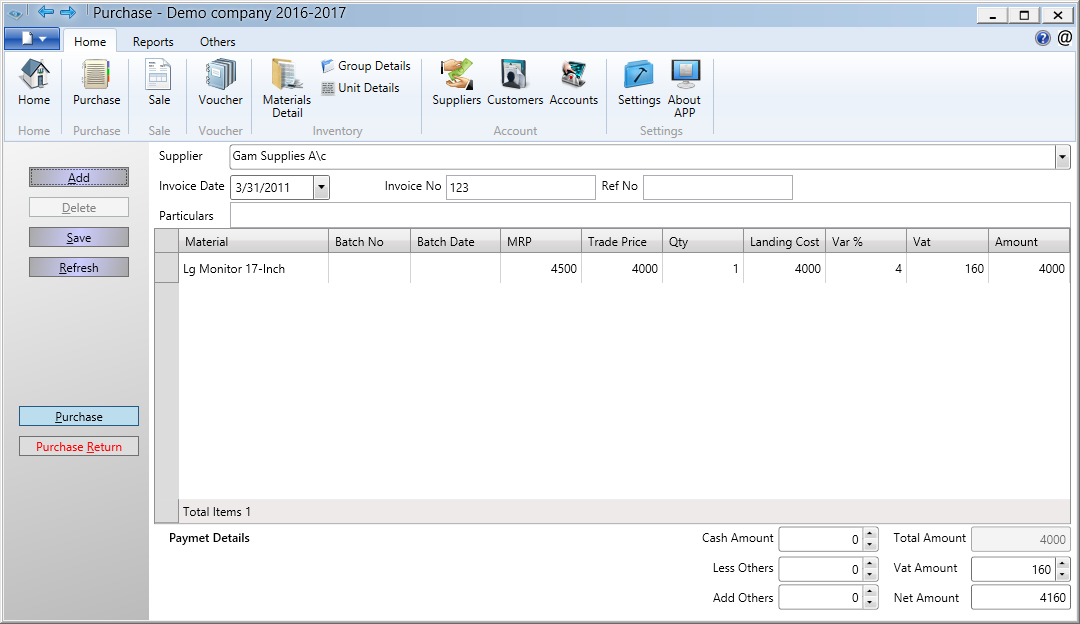
Purchase Entry (Ctrl+Alt+P):
Supplier
If you are receiving the bill on existing party/suppliers (Creditor) select the Party from drop down List. If party not exist then create the Supplier from Supplier dialog box. after selecting the supplier and date and invoice number click on Add button will add new line item in purchased item list.
Name of the Item
From the list of Stock item/Products details, select the stock item that is being purchased. If it is not in the list, create it using Product details screen . Use [F2] to search the item (Cursor must be in Product Column). After Entering the Quantity, Vat/tax Amount will be calculated depends on the Item Master Tax/VAT % Value.
Save Ledger :
Save the Purchase details with pressing the save to ledger button. Also it update the item stock,party ledger etc,.
Note :
- Field LC (Landing Cost) considered for purchase stock value calculation, Make sure enter the valid amount In field LC including cost + Expenditure + Tax (if required)
- Edit the purchase, select the supplier, date and invoice no to open already saved invoice in edit mode for modification.
- Edit the Invoice no, click on option and enter old number and new number and save the details.
- Delete invoice button visible only when invoice in edit mode
- Click on Add button to insert new line in Item details lists. Alt+A add new item shortcut key
- Select the Item and delete button to delete the item from list. Alt+D delete item shortcut key
- If barcode is enabled then barcode column will be visible in Purchased item list, scanning the barcode from barcode scanner will populate all the item details like Product name, rate, price LC, Vat and purchase quantity etc.
- How to create the supplier refer topic here
- How to create Products refer topic here
- how to enable barcode scanning refer Enable Barcode Scanning
- Enter multiple batch number with comma ',' and press enter, system will split the batch number and create the new line item for each. This will reduce the data entry efforts if you are getting same item with multiple batch number/serial number/IMIE number.
- Selling Rate entered in purchase screen will be considered while billing only for Batch wise stock enabled product.
- Enter Selling rate as zero then system will consider the selling rate available at product screen in batch wise sales enabled products screen.
- When MRP is enabled then Selling rate cannot be greater than MRP validation enabled so system won't access Selling rate more than MRP, If selling rate need to be updated as per your choice then update MRP as Zero then system will allow the any number.